Google Calendar is Google’s solution to managing appointments, creating events and setting reminders, and is used as a productivity tool to make scheduling a breeze. It’s an effective option for personal and business use and offers a fresh approach to time management, moving away from the cumbersome and counterintuitive digital calendars fast becoming obsolete (though still, unhappily, being used by many companies worldwide).
Time spent searching for event details, meeting locations and business agendas is not time well spent, so we’ve created a guide to show users how to get the most out of Google Calendar, by sharing the tools required to integrate programs, processes and documents into one, easy-to-access location. When used in conjunction with Upvio -practice management software, you’ll be able to manage all of your personal appointments, business meetings, staff scheduling and company bookings with just a few keystrokes, and avoid the painful back-and-forth commonly experienced when conflicting schedules are involved.
So, let’s get started!
Google Calendar for Beginners
How to set up a Gmail account
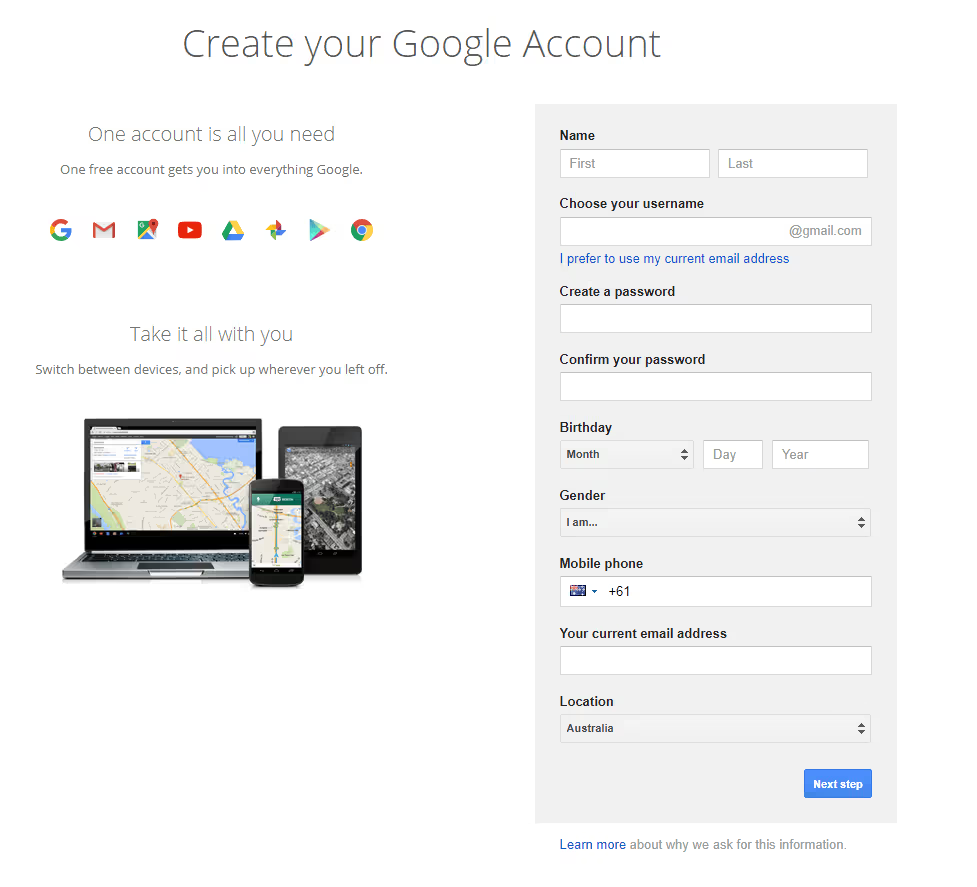
If you haven’t already, the first step to utilising the Google Calendar features is to set up a Gmail account. To do so:
Step 1: Visit https://accounts.google.com/signup/v2/webcreateaccount
Step 2: Enter your personal details, choose a name for your email account and create a password
A note about naming conventions
Once you’ve created your Gmail account and are ready to start setting up appointments, it’s important to take a moment to decide how you’re going to format your writing, particularly if you’re going to be working with a team. Following a naming convention, be it a guide found online or one you created yourself, makes finding information fast and easy. It may be tiresome and somewhat confusing at first, but once you get the hang of it you’ll save time, both when creating events and deciphering them. A few tips to consider when developing your naming conventions:
- Be consistent - whatever you come up with needs to be easily replicated, and should be used across the board
- Ensure your team understands and knows how to apply your naming convention
- Keep all descriptions and names succinct, but ensure you include all relevant detail as well
Google suggests the following format:
[city abbrev]-[building]-[floor] [room name] ([room capacity]) [Audio and video features]
E.g. SYD-12-4-Boardroom (25) VC
Translating to: This boardroom is in the Sydney office, building 12 on level 4, has a capacity of 25 and has video conferencing technology available.
Google Calendar for Personal Use
1. Add events to Google Calendar from your inbox
One of the things that makes setting up meetings so time consuming, is the pre-meeting discussion to find a location, time and date that suits all involved. Once you’ve sifted through the email chain and have received the final suggested time, rather than setting up a meeting manually, Google Calendar enables you to create an event straight from your inbox. To do this:
- Open your Gmail inbox
- Open the email message and select More
- On the dropdown menu, select Create event
- Fill in the event details, then select Save
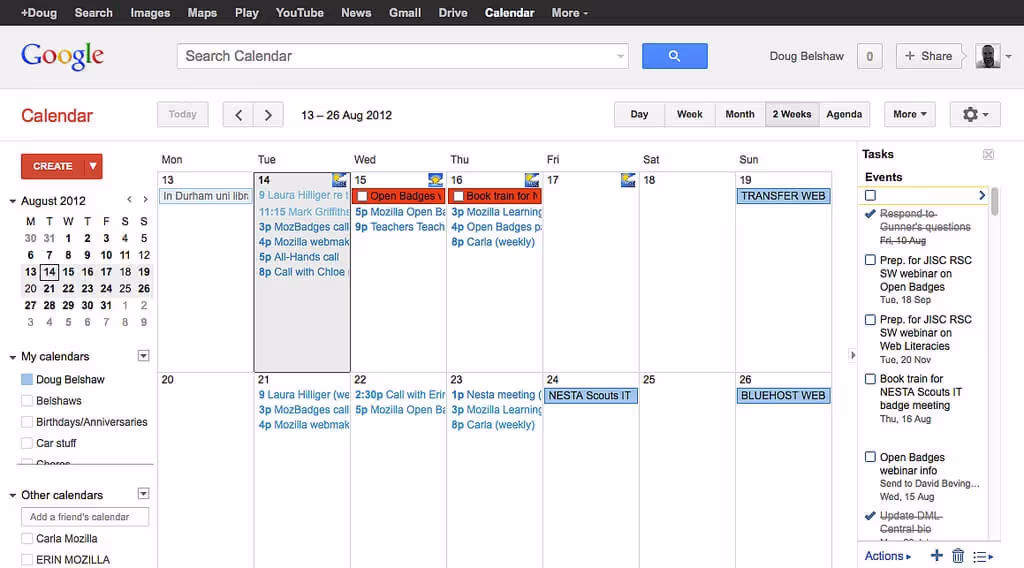
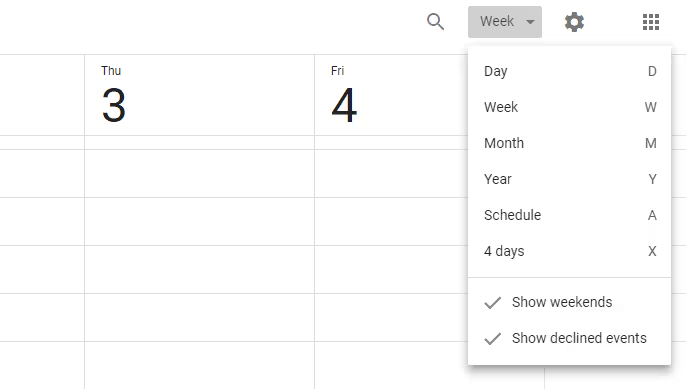
2. Customise your week view
Adjusting your view to suit your activities is a great way to reframe your week. Just like converting a fraction to percent, small adjustments in how you display and manage your calendar can lead to clearer insights and better time management. If you have hidden calendars or don’t include work events in your personal calendar, setting up a view that only shows relevant days will stop you getting sidetracked or confused by irrelevant events. Just don’t forget your dog Fluffly’s grooming appointment. He really hates it when you do that.
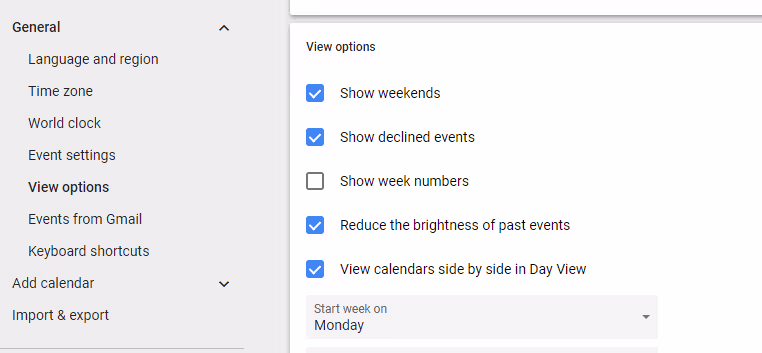
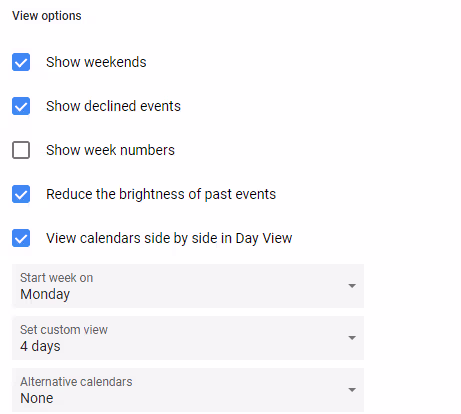
Depending on the type of work you do and the way in which you use your calendar, the view you set up may differ from day-to-day. For the most part, however, you’ll be using a specific view that may or may not include weekends or non-working dates. To set this up:
- Open Google Calendar
- Click on the gear icon on the top right side of the screen and select Settings
- Select View options
- Customise your view by selecting or deselecting Show weekends, and choosing your week start day and your custom view
- Select Save
3. Access your Google Calendar offline
As much as we all try to stay connected 24/7, sometimes we’re required to work in a place with spotty wifi or perhaps no internet connection at all. Accessing your events, appointments and reminders offline is a handy feature, particularly for those of us who aren’t, shall we say, organised?
When your Google Calendar is offline, whilst your changes won’t sync until you’re online again, you will be able to make changes to events, view appointments and respond to invitations. Simply open the app as you normally would to access.
4. Schedule email reminders for important events
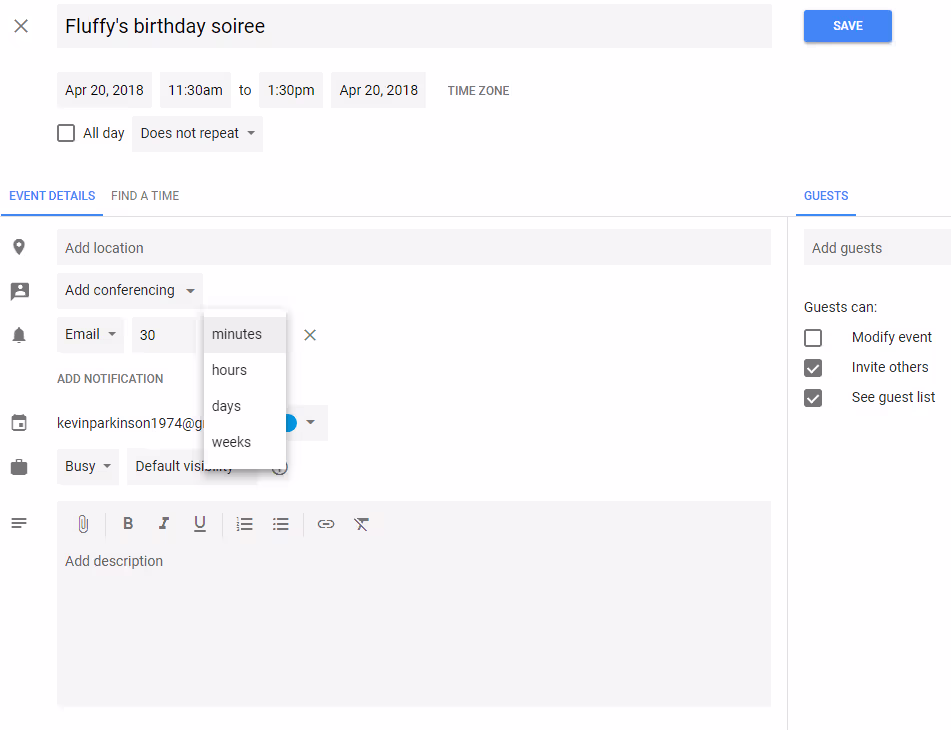
For some events, you may like to receive an email notification instead of a pop-up on your desktop or phone. Enabling this feature is done on an individual event basis, so you can customise each appointment to suit your needs. To set-up email notifications:
- Open Google Calendar
- Select the event you’d like to edit
- Next to the bell icon, select Notification
- Select Email from the dropdown list
- Choose when you’d like to be emailed, by updating the minutes/hours/days/weeks
- Select Save
5. Be your best self by setting and achieving personal and professional goals
Studies have indicated that we’re 40% more likely to achieve our goals if we write them down, so why not take advantage of a system you’re already using to help you achieve them?
This feature is only available on the Google Calendar app. To set up your goals:
- Open the app
- Click on Create in the bottom right-hand side of the screen
- Click on Goal
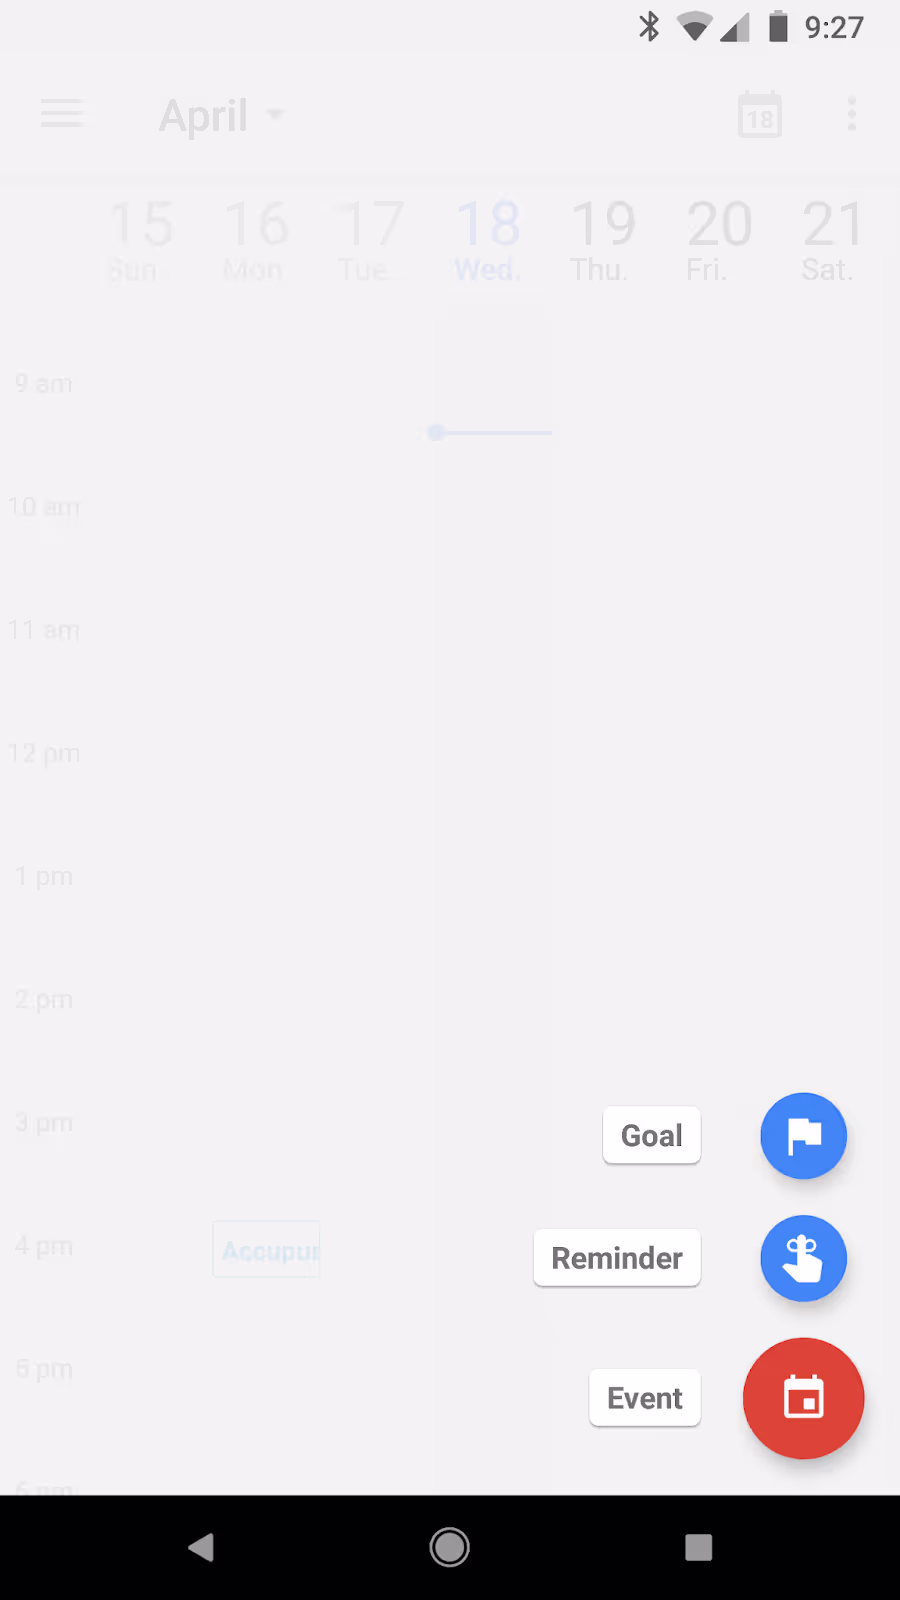
- Select a type of goal and answer the questions
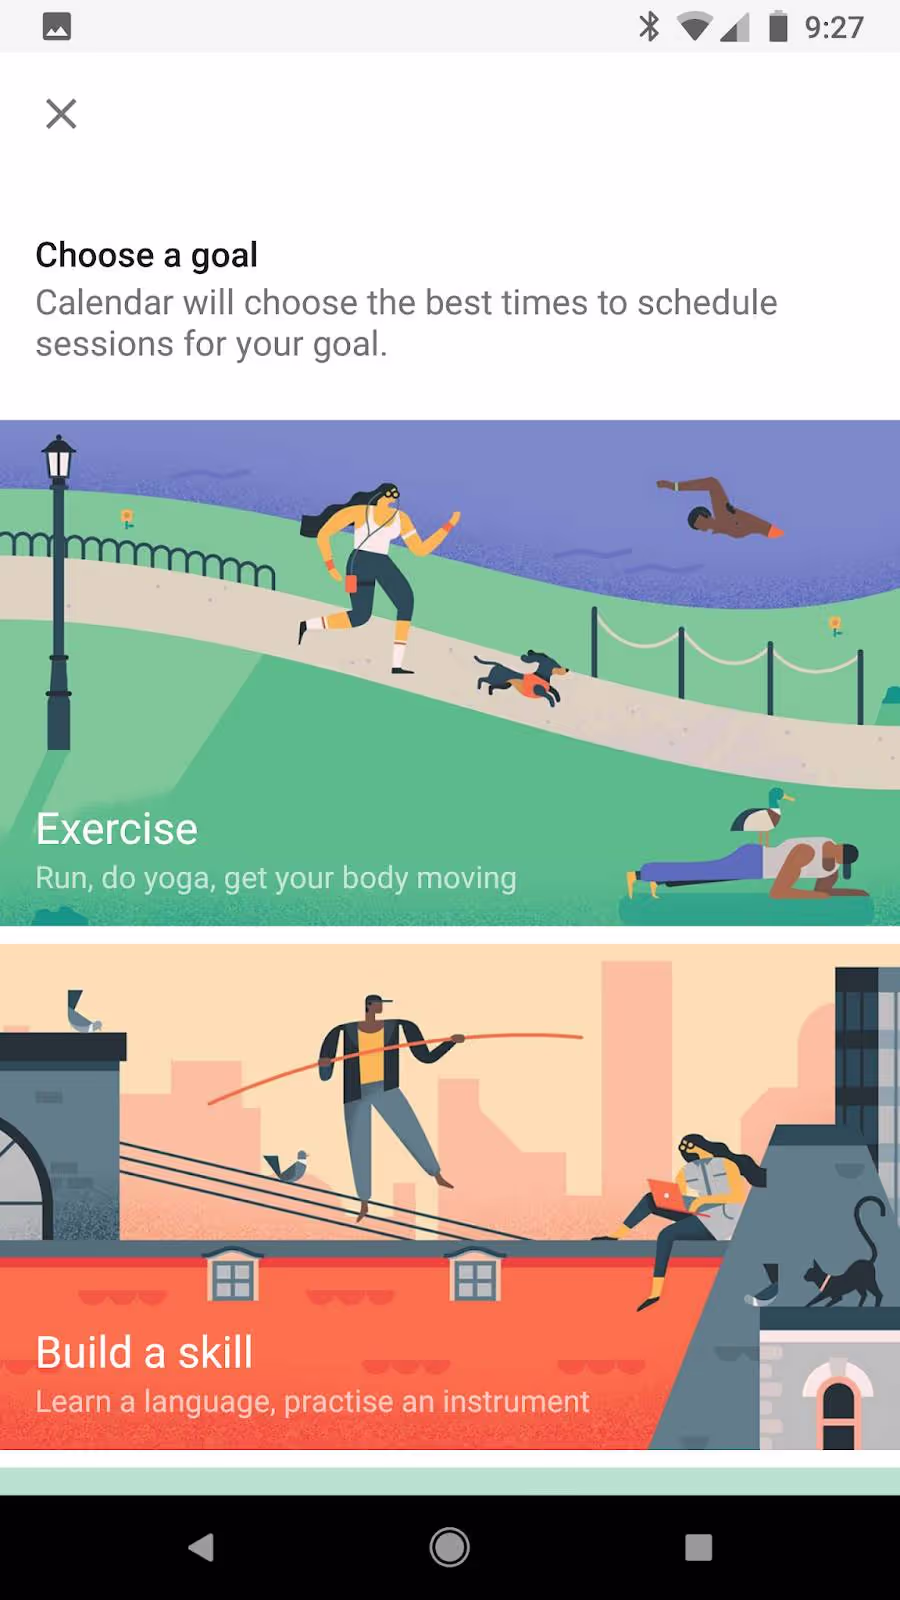
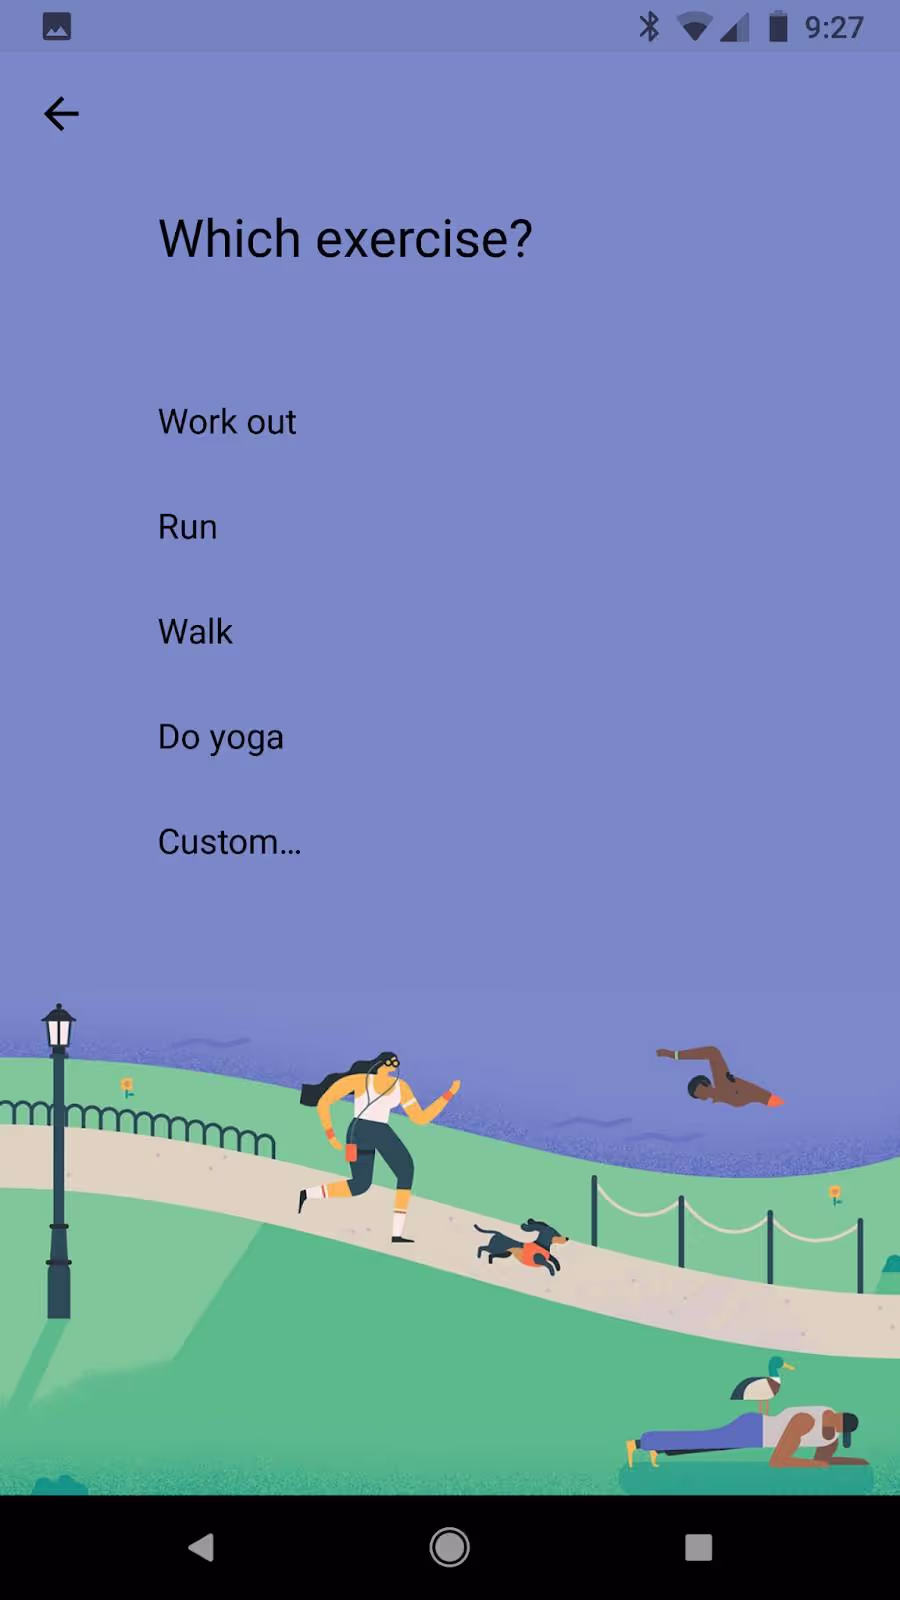
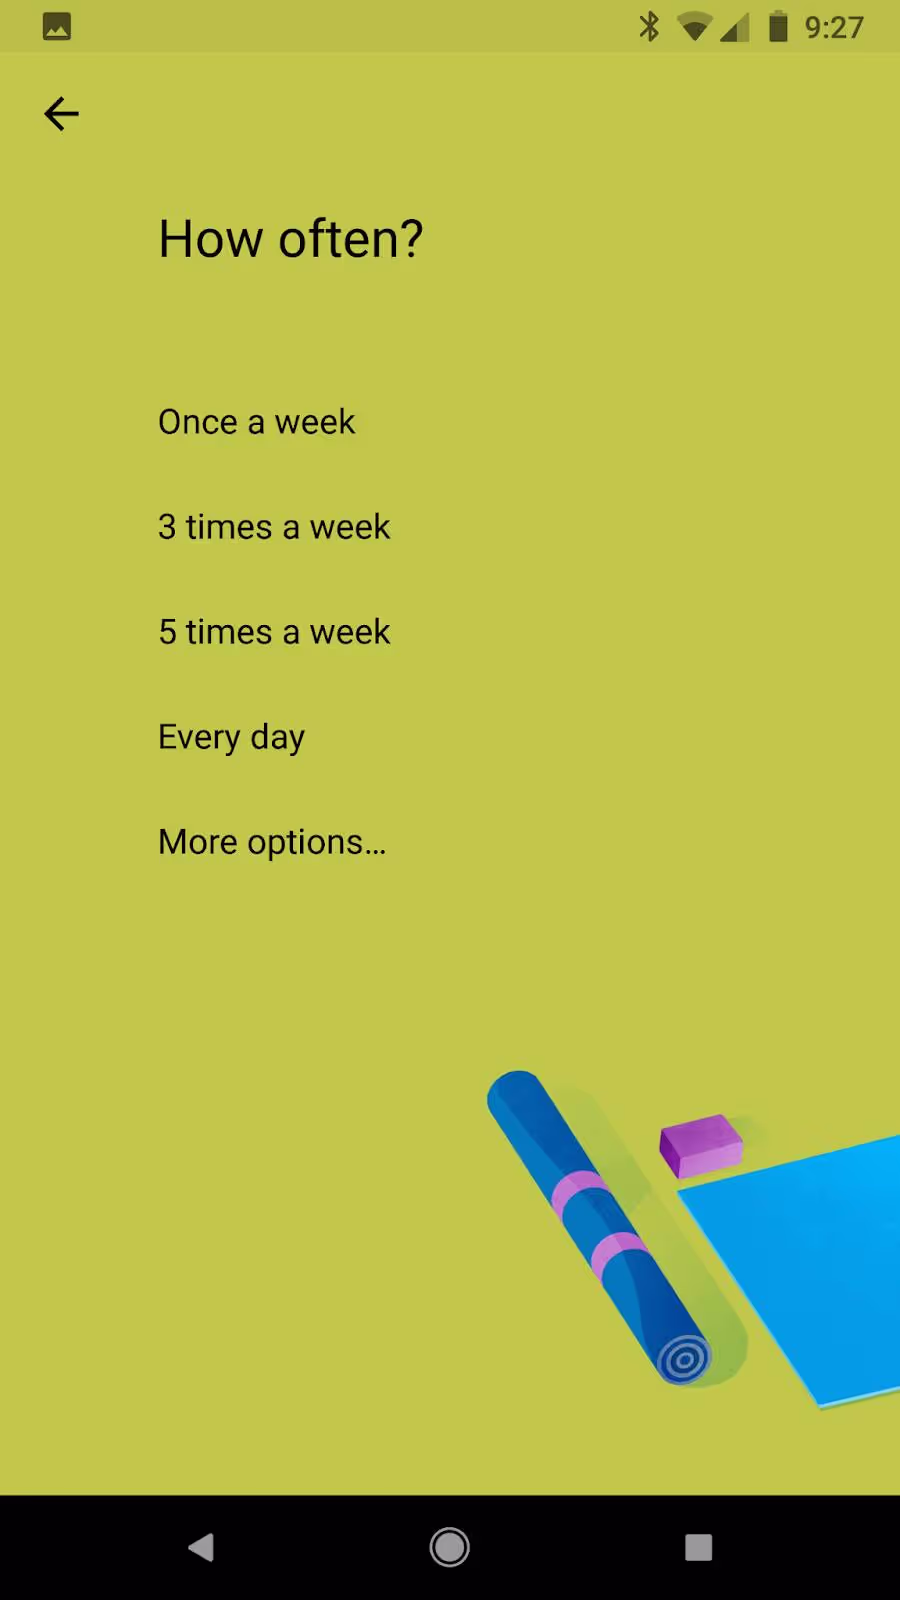
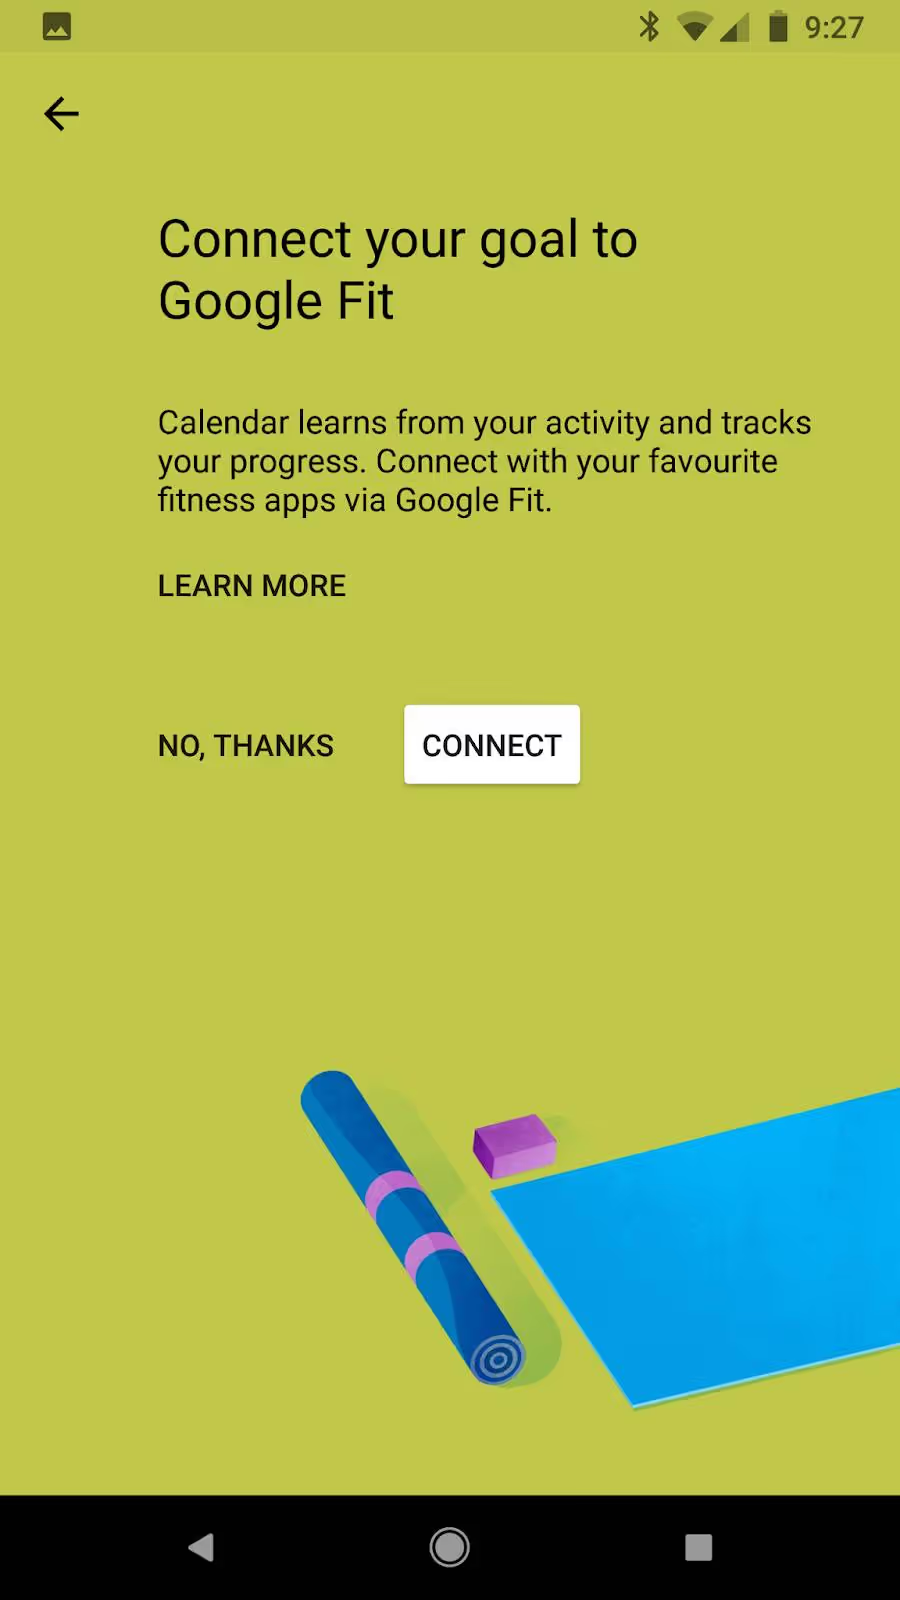
- Once you’ve finalised the details of your goal, select Done
Your goals will be added to your calendar, all of which can be adjusted.
6. Set up reminders for special occasions and birthdays
Unless you’re a traditionalist or really enjoy a good set of stationary, setting reminders and creating events in an online program is now pretty commonplace. You’re probably spending most of your day at your desk, so having special events, birthdays and important occasions recorded in your calendar will make them hard to miss, particularly with the customisable reminder settings.
You can activate this feature by signing up for a program like IFTTT, which enables you to link your devices and apps, setting rules to automate a lot of processes. Once you’ve input all of your special events into your Google Calendar, you can set-up email reminders to avoid missing any important dates.
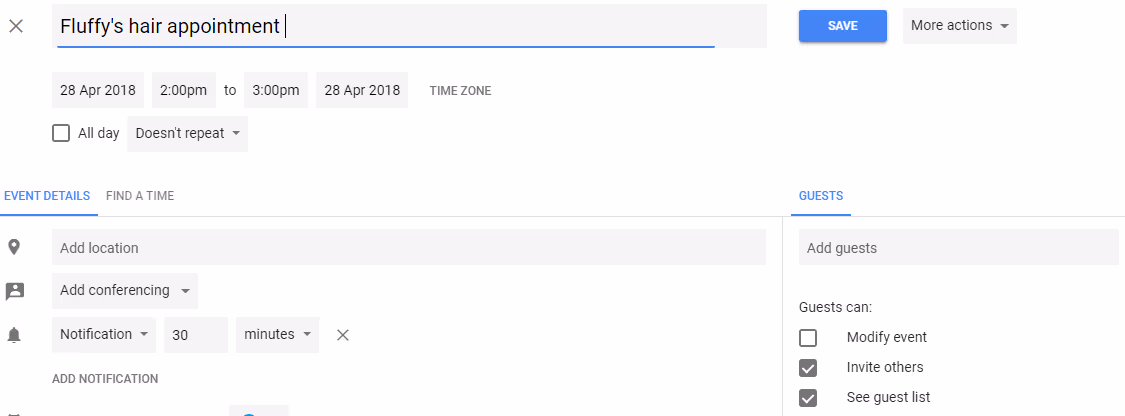
7. Invite guests to your events, so you’re not all alone
Once you’ve decided on a time and place for your event, it’s time to invite a killer a crowd! To add attendees to your events so they have the latest details and are set up to receive subsequent updates:
- Open Google Calendar
- Open the event
- Click on the edit icon
- On the right side of the screen, start typing the name of those you’d like to invite over Add guests
- Once you’ve added all of your guests, select Save
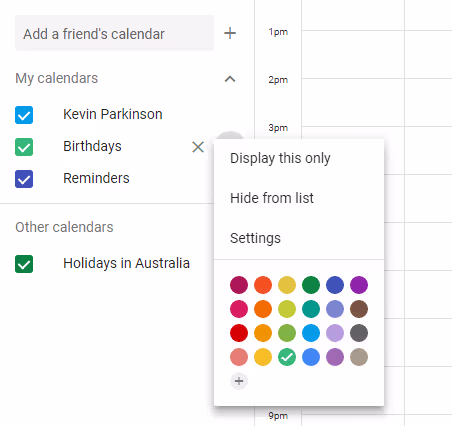
8. Colour code your calendars to separate types of appointments and events
Merging all of your appointments, special occasions and reminders in one place may seem daunting, but if done so in an organised and clever way, will save you time and energy, and help avoid confusion and stress. Colour coding is especially useful for keeping track of birthdays, anniversaries, social activities and family events, and will enable you to assess the upcoming week at a glance. Furthermore, you’ll start to see patterns emerge, and realise that whilst you’re spending a healthy amount of time catching up with friends over a bottle of wine, there isn’t a lot of gym time showing up afterwards. To colour code your events:
- Open Google Calendar
- If you have another Google account, add it by typing its name into Add a friend’s calendar
- Under My calendars, click on the vertical dot icon
- Select a colour for the calendar, or select Settings to update your permission and other settings
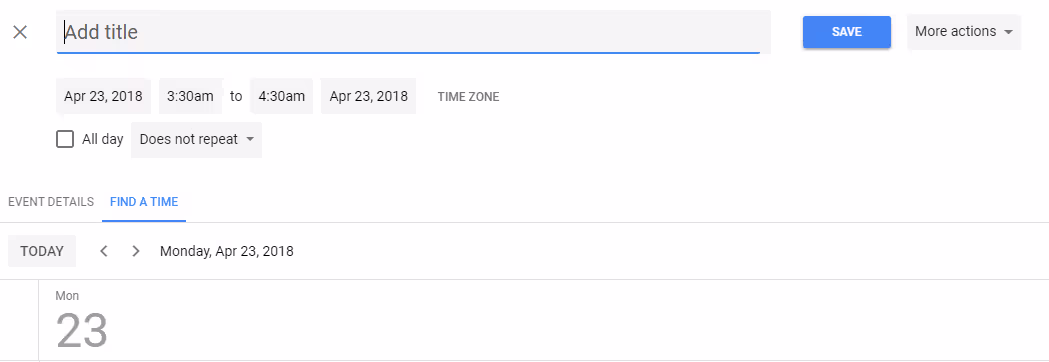
9. Find meeting time
If you’re trying to book a meeting but don’t have the time or energy to send multiple emails back and forth, Google Calendar has you covered. By using the Find a Time option, you’ll be able to view all relevant calendars at once and easily find availability.
- Open Google Calendar
- Create an appointment or open an already live appointment
- Next to EVENT DETAILS, select FIND A TIME
- Search your guests’ availability by searching with their email addresses
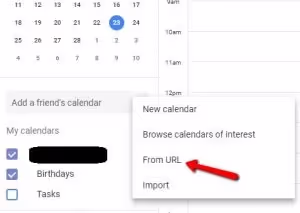
10. Add additional calendars of interest
The fantastic thing about programs like Google Calendar, is that they encourage you to broaden your horizons: either by connecting with people around the world through video chats, holding you accountable for the lofty goals you set yourself, or by sharing with you significant dates and events from calendars of interest. To add a calendar of interest and learn more about Judaism or the current Stardate (all you Star Trek fans know what I’m talking about):
- Open Google Calendar
- Click on the gear icon at the top right side of the screen
- Select Settings
- Select Add calendar on the left side of the screen
- Select Browse calendars of interest
- Add calendars of choice
Google Calendar for the Time Poor
11. Download the Google Calendar app to your phone to receive notifications wherever you are
To download the Google Calendar app, click here.
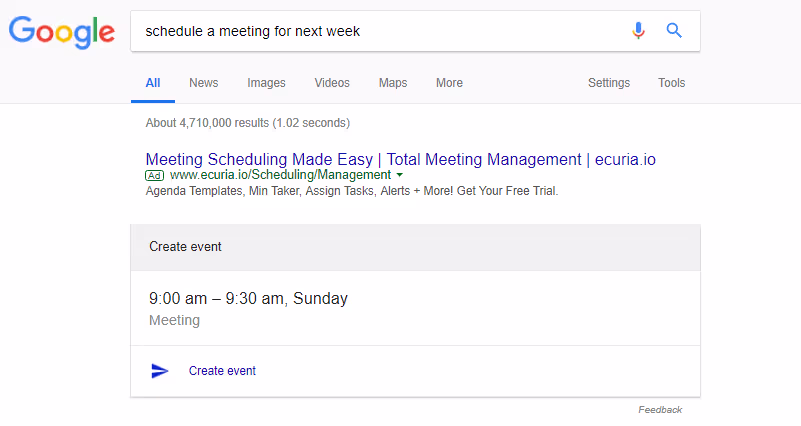
12. Schedule a meeting by typing directly into Google
If you’re setting up a last minute meeting or a casual catch-up, you don’t even have to bother opening up Google Calendar. Simply type your request into Google, and follow the prompts from there. To do so:
- Open Google
- Type in a phrase such as ‘Schedule a meeting next Sunday’
- Select Create event and edit the details
- Select Save
13. Block out full days to get things done
For days when you’re out of the office or have a time-sensitive project and cannot afford distractions, blocking out a full day is a worthwhile option to consider. Not only does this enable you to complete the task required with (hopefully) little interruptions, but also gives you a visual reminder of what needs to be done and the time in which it should be completed. To block out a full day:
- Open Google Calendar
- Create an event by clicking on a time of day and selecting MORE OPTIONS
- Under the date, tick the All day box
- Select Save
14. Change week start days
Unlike older, less flexible programs, Google Calendar is designed to be largely customised to work for you. To change your week start day to better match your hours, projects and preferences:
- Open Google Calendar
- Click on the gear on the top right side of the screen
- Select Settings
- Select View options
- Select Start week on
- Use the dropdown menu to select your preferred start day
15. Change the look of past events
If you have a hectic schedule and like to see what’s coming up at a glance, changing the appearance of past events is a feature you’ll want to integrate. To adjust the look and feel of past events:
- Open Google Calendar
- Click on the gear on the top right side of the screen
- Select Settings
- Select the box next to Reduce the brightness of past events
16. Use the Okay Google functionality on your phone to set-up events verbally
Nothing screams, ‘I’M TOO BUSY FOR THIS!’ better than screaming commands into your phone and making aggressive demands. If you’re driving, on-the-go or just lazy, use Okay Google as your personal assistant, just be aware that you may need to edit some mistakes at a later date. To set up an appointment verbally:
- Say Okay Google to your phone
- Say Create event
- Answer the questions and outline event details
- Your event will appear in your Google Calendar, and can be further edited from there

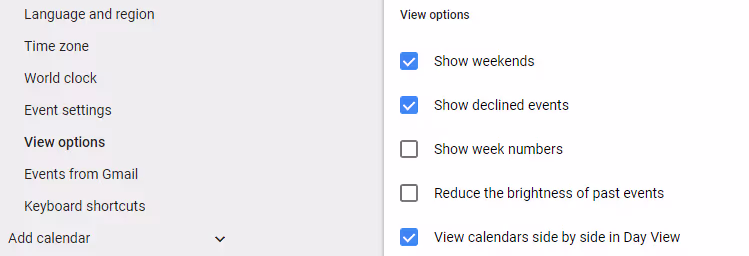
17. Show declined events
For those with busy, messy calendars, it probably makes sense to avoid confusion by removing declined events from view. For others, keeping track of meetings - even the ones you can’t personally attend - will serve as a reminder to add agenda items, check in on meeting outcomes and follow-up on important actions. To keep declined events in your Google Calendar:
- Open Google Calendar
- Click on the gear on the top right side of the screen
- Select Settings
- Select View options
- Select Show declined events
18. Automatically add meeting or event invitations to your calendar
Google offers users to ability to automatically add event invitations to the calendar, whether they’ve accepted or declined. Decide how you’d like to run things by customising this feature:
- Open Google Calendar
- Click on the gear on the top right side of the screen
- Select Settings
- Select Event Settings
- Select Automatically add invitations
- Select either Yes, but don’t send event notifications unless I have responded “Yes” or “Maybe” or No, only show invitations to which I have responded
19. Use keyboard shortcuts to save time
I’ll keep this short and sweet. Keyboard shortcuts will make you more efficient, productive and effective, and save you loads of time. To enable shortcuts:
- Open Google Calendar
- Click Settings on the top right hand corner of the screen
- Under Enable keyboard shortcuts click Yes
- Click Save at the bottom (RIGHT?LEFT) hand side of the page
Shortcuts
C
Create an event
E
View event details
Q
Quick-add event
J/N
Change calendar view to next date range
R
Refresh
P
Move to previous period
N
Move to next period
D
Day view
W
Week view
M
Month view
T
View of today
A
View agenda
S
View settings
20. Use Toggle to track your hours
Wondering how you’re spending your time? Using a time tracking app is a fantastic way to track your hours and work out what’s eating up your valuable minutes, and how you’re spending your working and non-working hours. Download the app here.
21. Set up new events with recurrences
If you’re planning an regular meeting or know you’ll be visiting the gym three times a week, setting up recurrences will save you time and serve as a reminder of upcoming commitments. To create an event with a recurrence:
- Open Google Calendar
- Click Create in the bottom right-hand side of the page
- Add the event details, including location, date, time and title
- Click on Does not repeat
- Select from the dropdown list, or create a custom recurrence by selecting Custom…
- Select Save on the top of the screen
22. Add a recurrence to an existing event
Don’t spend hours creating duplicate events each week. Setting up a recurrence means you’ll have a series of appointments set up in advance, and will give you first dibs on the swanky meeting rooms you never seem to book in time. Add a recurrence to an existing event:
- Open Google Calendar
- Select the event you’d like to edit
- Click on Doesn’t repeat
- Select from the dropdown list, or create a custom recurrence by selecting Custom…
- Select Save on the top of the screen
23. Edit events with recurrences
If you need to make changes to events with recurrences, Google Calendar gives you the option to change all of the events, some of the events or even just one. To edit events with recurrences:
- Open Google Calendar
- Select the event you’d like to edit
- Make any changes
- Select Save on the top of the screen
- Select which events of the series you would like to update
24. RSVP to meetings and appointments directly from Gmail, without opening Google Calendar
This is another fantastic feature for those looking to boost productivity, save time and focus their attention on more significant tasks. Sending a quick RSVP without having to open an email is the perfect hack for the busy executive. To do so:
- Open Gmail
- Open the email
- RSVP to the event by selecting Yes, Maybe or No
Google Calendar for Teams
25. Share your calendar with a colleague or friend
Sharing a calendar with a partner, family members, friends or colleagues is another time-saver offered by Google Calendar. Rather than having to check who is free, when, simply open your calendar to find out for yourself. You don’t have to give full permission to those with whom you share, so be sure to check all of the settings before confirming. To share your calendar:
- Open Google Calendar
- Click on the settings icon
- Select Settings
- Click on the name of the calendar you wish to share
- Select Share with specific people
- Type the name of the person with whom you’d like to share your calendar, and type it into the ADD PEOPLE textbook
26. Ask for permission to view calendars
Of course, sharing a calendar with everyone in your life would lead to the most horrifyingly colourful and busy calendar view imaginable, so let’s not get carried away. Instead, you can request permission to view calendars to keep track of your colleagues’ movements, noteworthy events, and to track availability when scheduling meetings. If you have a super secretive colleague who doesn’t want share, you’ll just have to awkwardly hang around their desk to see what’s what.
To request permission to view someone’s calendar:
- Open Google Calendar
- Type in the relevant email address or URL in the Add a friend’s calendar textbox on the left side of the screen
- Select Enter
- If it hasn’t been shared with you, you’ll be prompted to complete a form requesting access. If it has been shared with you, it will be added under Other calendars
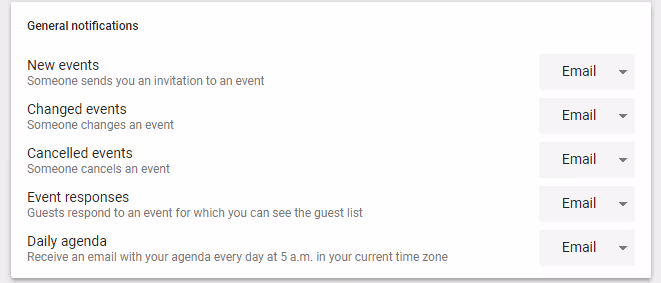
27. Receive a daily agenda to keep track of the day’s tasks
Having your agenda emailed to you at 5:00am will mean by the time you log on, you’ll have a clear list of the tasks you need to complete. To set up your daily agenda:
- Open Google Calendar
- Click on the settings icon and select Settings
- Click on the name of your calendar
- Select General notifications
- Next to Daily agenda, click on the dropdown and select Email
28. Add a resource, room or location to your meeting
If you’re inviting someone to an event, business meeting or catch-up, or even if you’re booking yourself in for an appointment, adding a location to the event gives everyone involved the information they need, without having to sift through past emails to acquire the details. To add a location:
- Open Google Calendar
- Open your appointment or create a new appointment
- Under EVENT DETAILS, click on Add location
- Enter your location
- Select Save
29. Hide less important calendars from view
You don’t need to view all calendars at once, especially when you’re trying to schedule a meeting or find out specific information. To hide calendars from view:
- Open Google Calendar
- On the left side of the screen, hover the mouse over the name of the person whose calendar you want to hide, and click on the vertical dots icon
- Select Hide from this list
30. Use Google Labs to quickly and easily view the details of your upcoming meeting
To use this feature you’ll first be required to enable Google Labs if you haven’t already. To do so:
- Sign in to your admin account
- Select Apps - G Suite - Calendar - Advanced settings, and select your organisation
- Under Calendar Labs, select Enable Labs for my users
- Select Save
Once you’ve enabled Google Labs, you’ll be able to use the Who’s my one-on-one with? Function to view attendee names without having to open up the appointment.
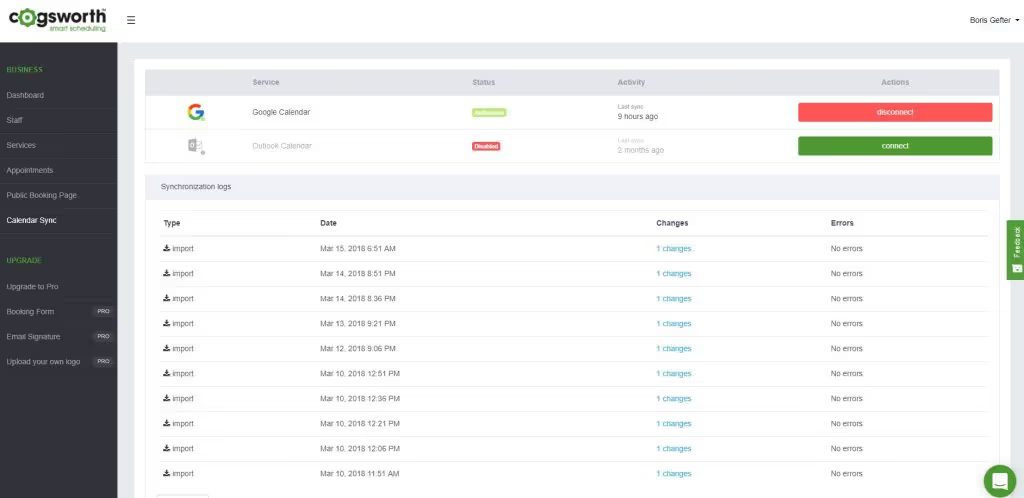
31. Sync your calendar with Upvio to boost productivity
Head over into the calendar sync portion of your Upvio app, then simply click "connect", and voilà your Upvio appointments will appear in your Google calendar!
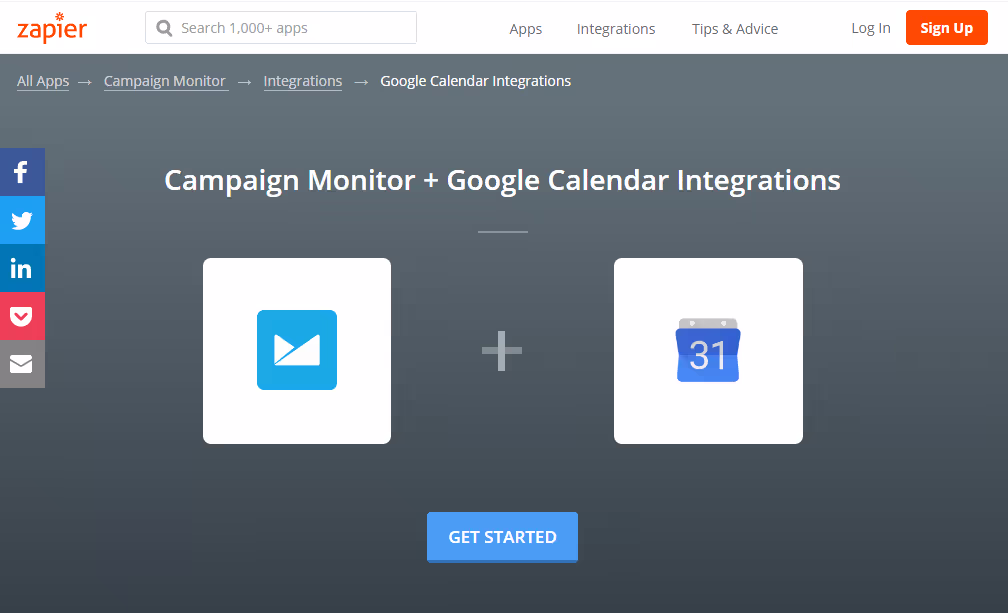
32. Integrate campaigns to your Google Calendar
Zapier has some great guides online. To learn more about Google Calendar integrations, click here.
33. Remove yourself from a meeting and assign a new owner
Don’t get stuck receiving irrelevant appointment reminders or meeting details that are no longer useful to you. Remove yourself from a meeting and assign a new owner, by:
- Open Google Calendar
- Open your event
- Click on the More actions dropdown
- Select Change owner
- Type in the email address of the person who will be taking over as the new owner
Google Calendar for Projects
34. Integrate Google Calendar onto your website with Upvio
Google enables calendar integration onto a website, but it has limited function. Upvio enables customers to not only view your calendar, but make appointments directly based on the availability of the service, with their preferred staff member. Avoiding the back-and-forth emails and phone calls, and the basic human error associated with making bookings in advance, will most certainly save you time and money.
To integrate Google Calendar onto your website:To integrate Upvio onto your website:
- Go to Public Booking Page
- Copy your URL or embed your iframe onto your site
BG TO PROVIDE MORE INFORMATION
35. Import events into your Google Calendar
A good program should never make you do something twice. To important events straight into your Google Calendar:
- Open Google Calendar
- Click on the gear icon and select Settings
- Select Import & export
- Select Import
36. Create a shared calendar that multiple people can edit
Essential for any team or project work, creating a shared calendar for the duration of your work will put a stop to confusion, clashing events and version control issues. To create a shared calendar:
- Open Google Calendar
- Find the calendar you’d like to share and click on the vertical dot icon
- Select Settings and sharing
- Select Share with specific people
- Enter email addresses in the ADD PEOPLE text box
- Update any other settings
37. Set up a world clock
This feature also requires enabling Google Labs. To add a world clock:
- Open Google Calendar
- Click on the gear icon and select Settings
- Select Labs
- Scroll down to World Clock and select Enable
- Select Save
You will now see a world clock on the right side of the screen.
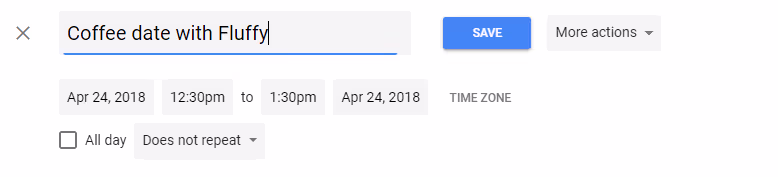
38. Change the time zone of an event to suit the location or attendees
If you’ve ever had to set up an event with guests from conflicting time zones, you will have experienced the deep, dark tunnels of scheduling hell, and made an oath to never go back to such a horrifying place. Next time, try using Google Calendar’s time zone feature, which will have you back on track in no time. To change the time zone:
- Open Google Calendar
- Open the appointment
- Select TIME ZONE
- Use the dropdown menu to choose your preferred time zone
- Select OK

39. View a date range by clicking and dragging
This is a super handy hack that gives you instant access to a date range you need to check. To view a specific date range with a just a click and a drag:
- Open Google Calendar
- Click and drag the mouse over the date ranges displayed on the left side of the screen
- View the selected area on the main section of your calendar
40. Add an attachment to a meeting or event
Event attachments are more applicable in a business setting, but can also useful for medical appointments requiring referrals, events requiring digital passes and trips with associated tickets. To get the most out of any calendar system, users should be working towards keeping all of the information together, to eliminate the need to access emails, search for files or follow-up with phone calls.
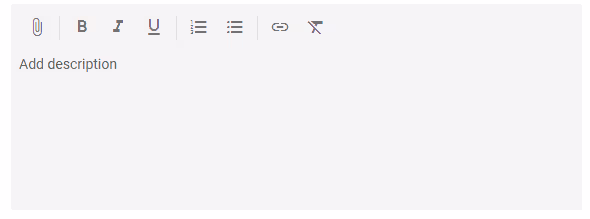
To add attachments to events:
- Open Google Calendar
- Open the event or appointment
- Above Add description, click on the attachment icon
- Upload any attachments, then select SAVE
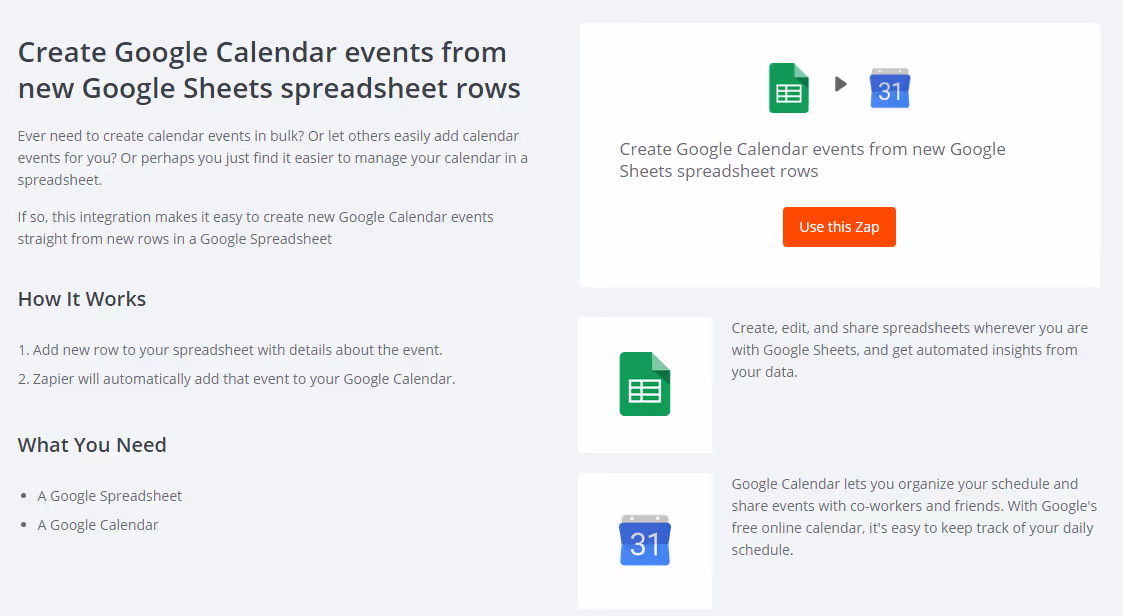
41. Use Zapier to create events from Google Sheets
Another cool Zapier feature, which can be found here.
42. Email guests of your appointment
Rather than spending time searching for emails, send a message directly from your appointment. To email your guests:
- Open Google Calendar
- Open your appointment
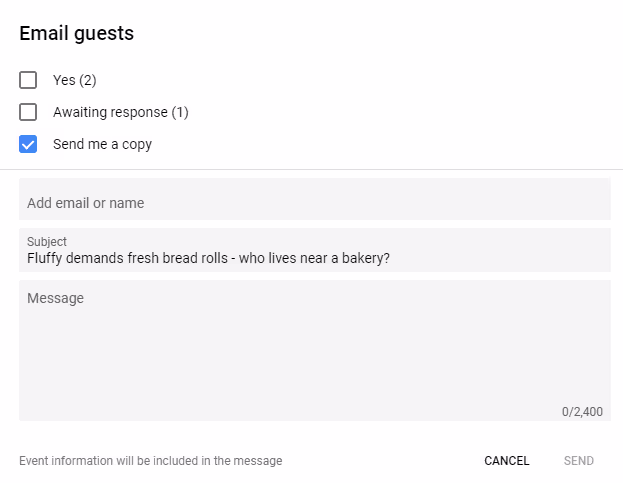
- Under the GUESTS tab, select the envelope icon
- Select the guests you’d like to invite, either by checking the tick boxes or manually adding email addresses
- Update the subject line and type in your message
- Select SEND
43. Add a note to an appointment
If you need to add a brief message to your appointment but don’t want to update the event description and notify everyone, adding a note is best practice. To add a note:
- Open Google Calendar
- Open your appointment
- Next to the RSVP box, select ADD NOTE/GUESTS
- Add your note, then select DONE
44. Track guest RSVPs at a glance
We’ve all created an event on Facebook and eagerly refreshed the page a hundred times, to find out if anyone will attend of if we’re doomed to die alone (just me?). Scheduling a business meeting, group dinner or event via Google Calendar probably won’t be as anxiety inducing, but tracking attendance is nonetheless important. Being able to see who has accepted an appointment in advance means that any rescheduling can take place with plenty of notice, and other changes can be made with ease. To track attendance:
- Open Google Calendar
- Select the appointment you want to check
- View the status of each guest under the ‘X guests’ heading, and by checking the icon next to each attendee’s name
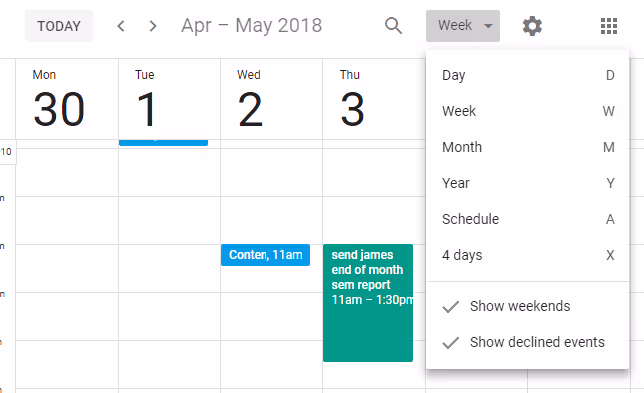
45. View your whole year on one screen
If you’re a long-term planner or work in an environment where launches, bookings or events are scheduled months ahead of time, knowing how to switch to a year view is essential. Whilst moving between months is likewise a useful feature, if you’re working with larger periods of time it’s easy to miss details or dates. To view your calendar for a full year:
- Open Google Calendar
- On the top right side of the screen, click on the dropdown to the left of the settings icon
- Select Year to view your full year of calendar events
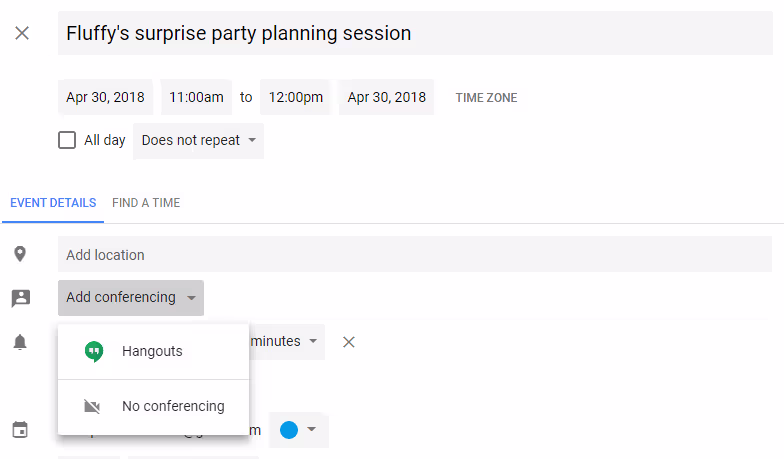
46. Set-up a video conference with Google Hangouts
An excellent option for those overseas stakeholders with whom you meet regularly, video conferencing is an important feature to know how to use. To set up a video conference using Google Hangouts:
- Open Google Calendar
- Create or open your event
- Under Event Details, select Add conferencing
- Select Hangouts
The recipient will receive an appointment invitation, which will include a link titled Join Hangouts, enabling them to join the call.
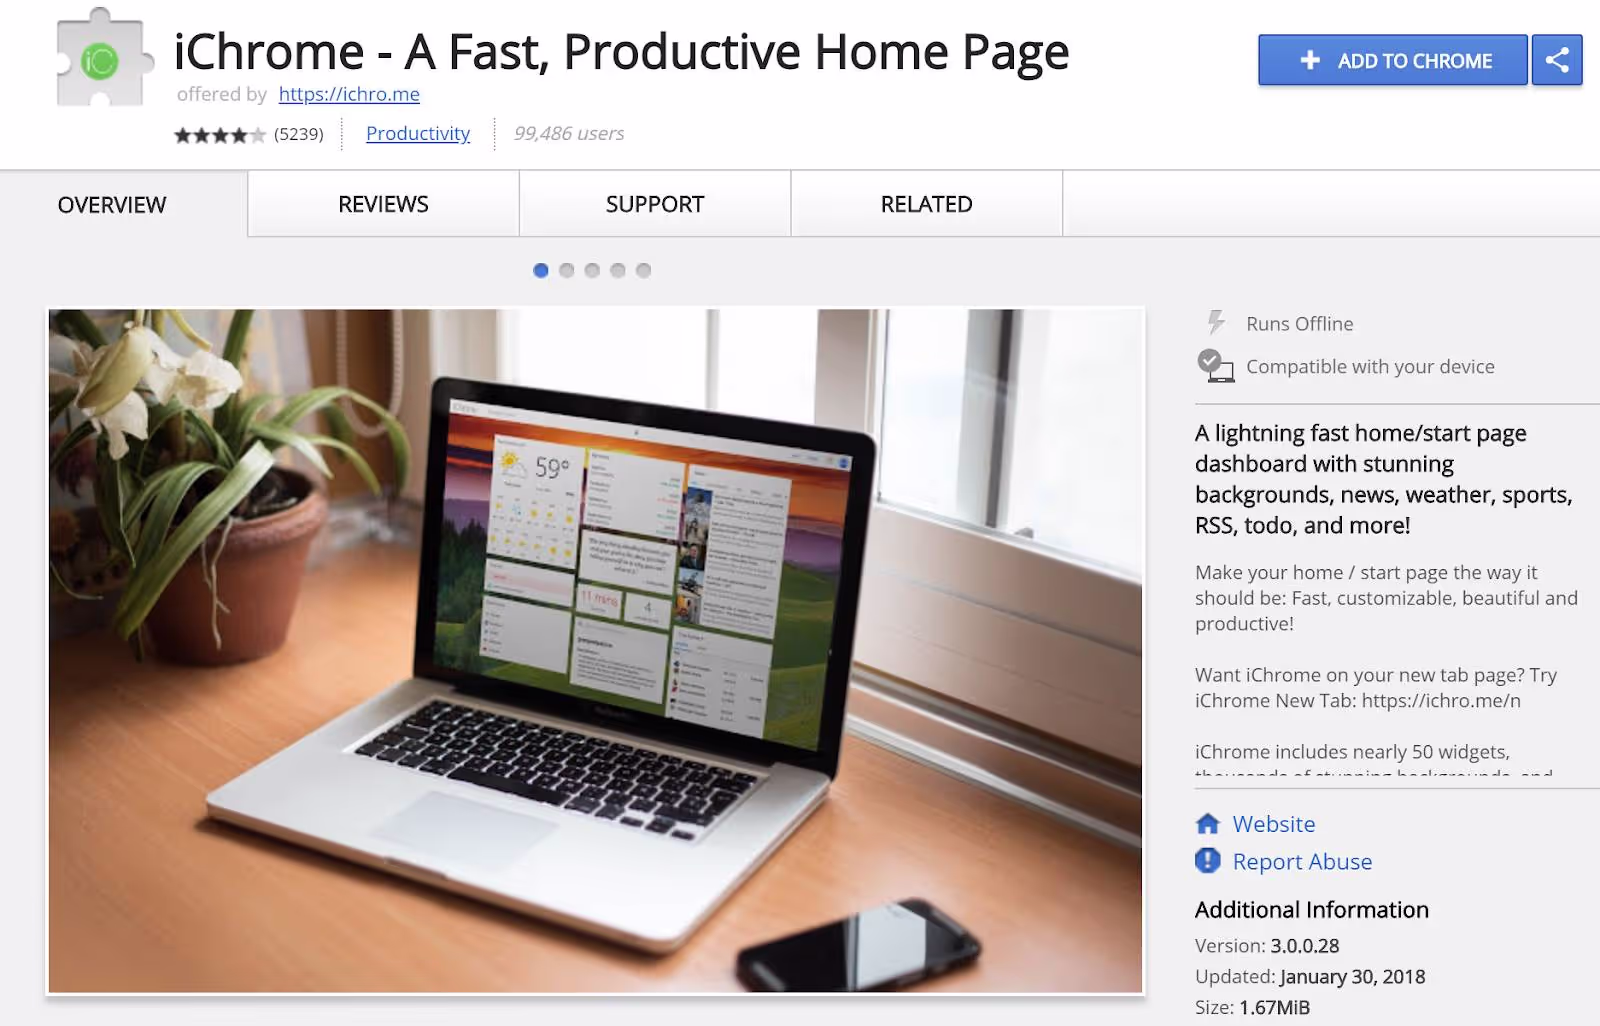
47. View your calendar and other information on your desktop
Sometimes you won’t feel like opening your calendar when all you really want is a quick overview of your day. iChrome is a nice extension that will add calendar highlights, the weather and other handy pieces of information to your desktop. Download it here.
48. View your upcoming project schedule
Don’t wait for deadlines to creep up on you or let your plans get derailed. View your upcoming project schedule each fortnight to keep track and stay on top of your tasks. To view your schedule:
- Open Google Calendar
- Next to the date, click on the dropdown menu and select Schedule
- View your schedule for the upcoming two weeks
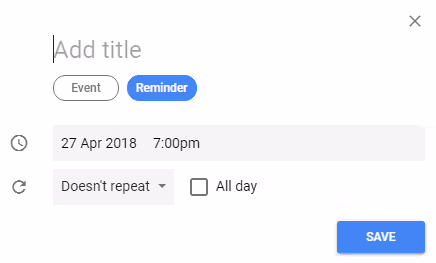
49. Easily schedule reminders for project deadlines
Setting reminders is a great way to keep all those involved in team projects accountable, and serves as a nice, well, reminder that something needs to be actioned. To set up a reminder:
- Open Google Calendar
- Click on the time you’d like to book
- Under Add title, select Reminder
- Enter the reminder details, then select SAVE
50. Reduce "no shows" for appointments and never run late
Head into the calendar notification center in Upvio - medical appointment scheduling software, and setup email and SMS reminders to go out to staff, customers and yourself to remind you about appointments.


